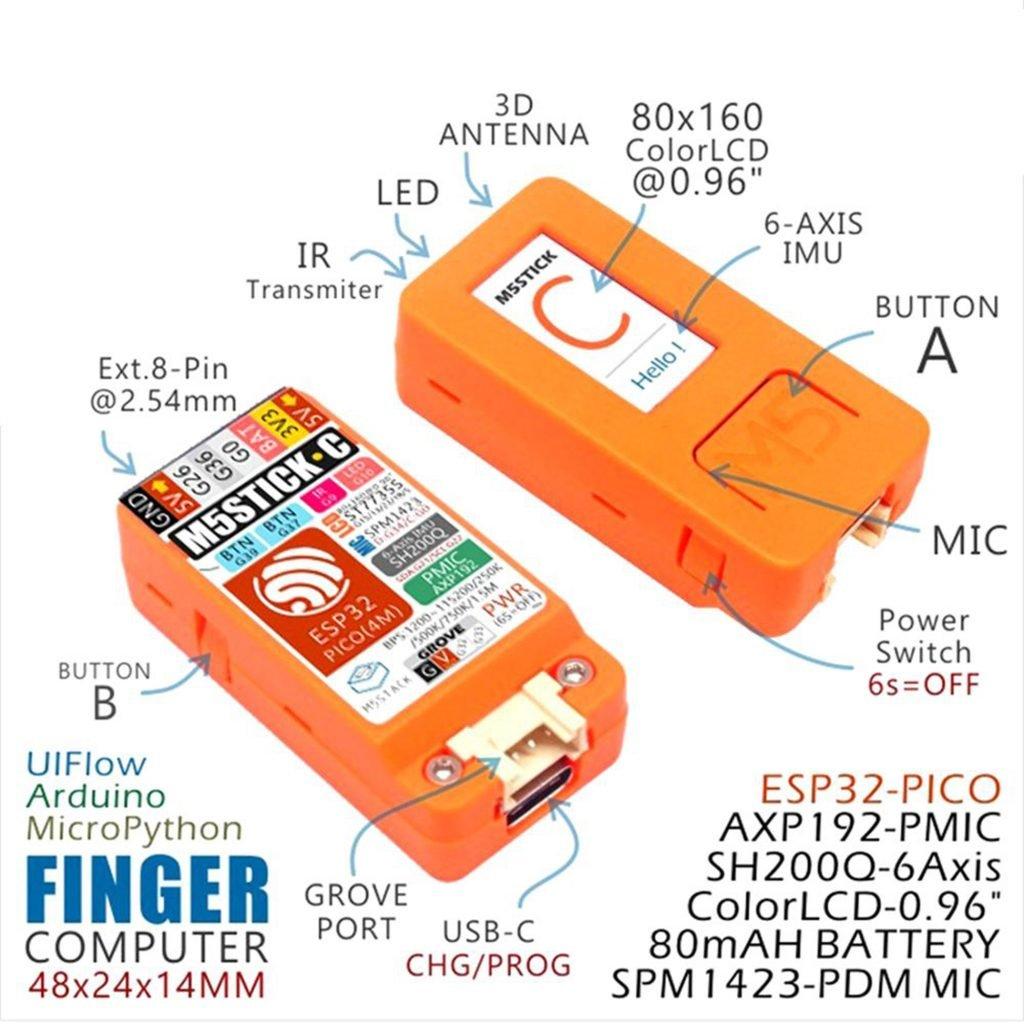
In this article we look at the M5StickC which is a development board based on the ESP32-PICO from m5Stack.
In the image below you can see an overview of the front and back of the device and the features that are built in.

Lets look at some of the features
Features
| ESP32 | At the heart of the device is an ESP32 which has a 240MHz dual core, 600 DMIPS, 520KB SRAM, Wi-Fi capabilities, dual mode Bluetooth |
| Flash Memory | There is 4MB of flash memory available |
| Power Input | The device requires 5V power |
| Ports | There is 1 USB Type C port ,a GROVE connector and an expansion port |
| LCD screen | The device has a 0.96 inch, 80*160 TFT LCD which is controlled by a ST7735S chip |
| Button | You have 2 Custom buttons which you can use |
| LED | There is a RED LED on the board |
| MEMS | The MPU-6886 is a 6-axis motion tracking device that combines a 3-axis gyroscope and a 3-axis accelerometer |
| IR | There is an IR transmitter on board |
| MIC | There is a built in microphone which is the SPM1423HM4H-B this is a miniature, high-performance, low power, digital microphone with a single bit PDM output |
| RTC | The M5StickC has a BM8563 for RTC functions |
| PMU | An AXP192 chip is used for the integrated power system management, for single core lithium batteries (lithium ion or lithium polymer) and multi-channel switching power |
| Battery | There is a 3.7v battery which can supply 95 mAh |
| Antenna | There is a 2.4G 3D Antenna built in |
Development
The board supports UIFlow, Arduino and FreeRTOS development environments.
For Arduino development you need to add ESP32 support via the board manager by adding the following ESP32 Boards Manager url to the Additional Boards Manager URLs:
https://dl.espressif.com/dl/package_esp32_index.json
Once all of the required files are downloaded then you need to Navigate to Tools->Board:->Boards Manager and then Search ESP32 in the pop-up window, find it and click Install
Under T Tools->Board:-> ESP32 Arduino you will see M5Stick-C in the list
There are a couple of code samples available from https://github.com/m5stack/M5StickC-Plus
When you power the unit on the factory example will run, pressing the A button will cycle through the various example, here are some screenshots of the examples – there is a MPU-6886 , an IR transmitter , a microphone , an RTC and bluetooth example in the factory installed code.
You can view the code in the github link above
You can also use UIFlow which is a nice and easy graphical development environment similar to the makecode one which is available for the Microbit.
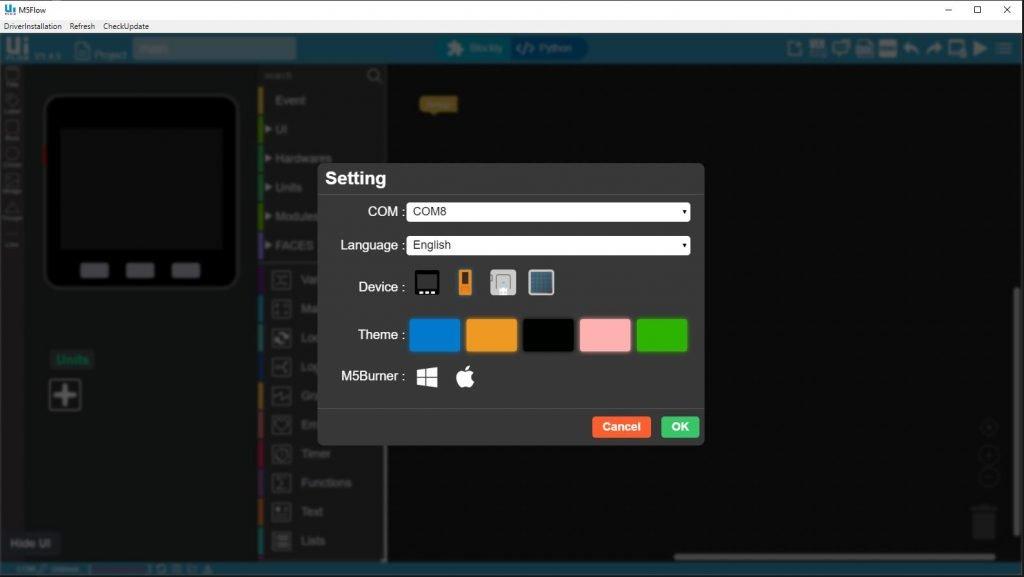
This is what the gui of UIFlow looks like

You can see that there is an icon for the M5Stick and the com port which in my case was COM8. Once selected you can drag and drop blocks as desired, the tool can check for updates and also install the driver for the board
This allows you to drag and drop blocks on the screen to create your programs and there is also an option to switch to python code as well.
Expansion
There is a grove style connector and an 8 pin external connector. There are a few modules available for the 8 pin expansion connector.
You can see the hat fitted to the M5Stick, although the example displayed is not using this we will have some examples using these hats.
You can develop your own and in fact there is a prototyping hat available. In the image at the top of this article you can see the pins that are available via the connector
Buying
I have a couple of links, shipping will vary and prices as well depending where you buy them but I have put in rough prices
| Vendor | Cost |
| AliExpress.com | $40 |
| Amazon link |
$23 |
Ebay |
Various prices |
Summary
A very cost effective, robust little development board with a number of expansion options. This would make it ideal for IoT projects and with easy integration with the Arduino IDE its easy to get started with.
A recommended product

