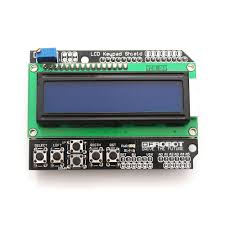
Its fairly easy to add an LCD to a Linkit One, in this example we used one of the Arduino LCD shields that can be bought relatively cheaply. The one drawback with these shields is that certain pins are always used and these cannot be changed unlike if you were to wire an LCD up to a Linkit
In the code you will see later you will see the following line LiquidCrystal lcd(8, 9, 4, 5, 6, 7);
Basically these I/O pins are used by the LCD and cannot be used to connect to other devices
Lets look at a typical shield

Code
The code is fairly straightforward and displays the usual hellow world on one line of the LCD and displays a number on the second one which gets incremented
The code is based on one that is installed when you download and install the Arduino IDE
[codesyntax lang=”cpp”]
// include the library code:
#include <LiquidCrystal.h>

// initialize the library with the numbers of the interface pins
LiquidCrystal lcd(8, 9, 4, 5, 6, 7);

void setup()
{
  // set up the LCD's number of columns and rows:
  lcd.begin(16, 2);
  // Print a message to the LCD.
  lcd.print("hello, world!");
}


void loop()
{
  // set the cursor to column 0, line 1
  // (note: line 1 is the second row, since counting begins with 0):
  lcd.setCursor(0, 1);
  // print the number of seconds since reset:
  lcd.print(millis() / 1000);
}
[/codesyntax]
That’s all there is too it, we will look at this in further examples when we display various sensor readings on our LCD
