In this example we connect an Ethernet shield to an Arduino, we then connect a GY-21P sensor to this and we will send the values to Thingspeak
Lets take a look at the GY-21P.
Sensor Overview
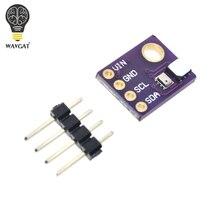
The GY-21P is an interesting module in that it combines a BMP280 sensor and an SI7021 sensor. The on-board BMP280+SI7021 sensor measures atmospheric pressure from 30kPa to 110kPa as well as relative humidity and temperature.
BMP280
Pressure range: 300-1100 hPa (9000 meters above sea level at -500m)
Relative accuracy (at 950 – 1050 hPa at 25 ° C): ± 0.12 hPa, equiv. to ± 1 m
Absolute accuracy (at (950 – 1050 hPa, 0 – +40 ° C): ± 0.12 hPa, equiv. To ± 1 m
Mains voltage: 1.8V – 3.6V
Power consumption: 2.7µA at 1Hz readout rate
Temperature range: -40 to + 85 ° C
SI7021
HVAC/R
Thermostats/humidistats
Respiratory therapy
White goods
Indoor weather stations
Micro-environments/data centers
Automotive climate control and defogging
Asset and goods tracking
Mobile phones and tablets
Size: 1.3*1cm/0.51*0.39″
Features:
Operation Voltage: 3.3V
I2C & SPI Communications Interface
Temp Range: -40C to 85C
Humidity Range: 0 – 100% RH, =-3% from 20-80%
Pressure Range: 30,000Pa to 110,000Pa, relative accuracy of 12Pa, absolute accuracy of 100Pa
Altitude Range: 0 to 30,000 ft (9.2 km), relative accuracy of 3.3 ft (1 m) at sea level, 6.6 (2 m) at 30,000 ft.
Thingspeak setup
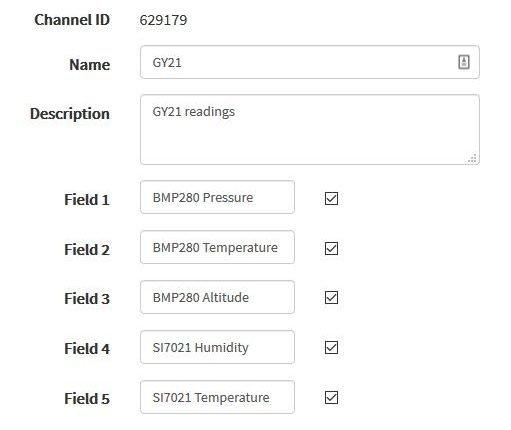
You will now need to create a new account at thingspeak – https://thingspeak.com. Once done create a new channel and add one new field called temperature. You can see this in a screen capture of my simple channel, notice the ChannelID you will need that in your code later. You can also fill in other fields such as Name, description and there are a few others as well. The key one(s) are Field1, Field 2 , Field 3, Field 4 and Field 5 – this effectively is the data you send to thingspeak

Parts List
Schematics/Layout
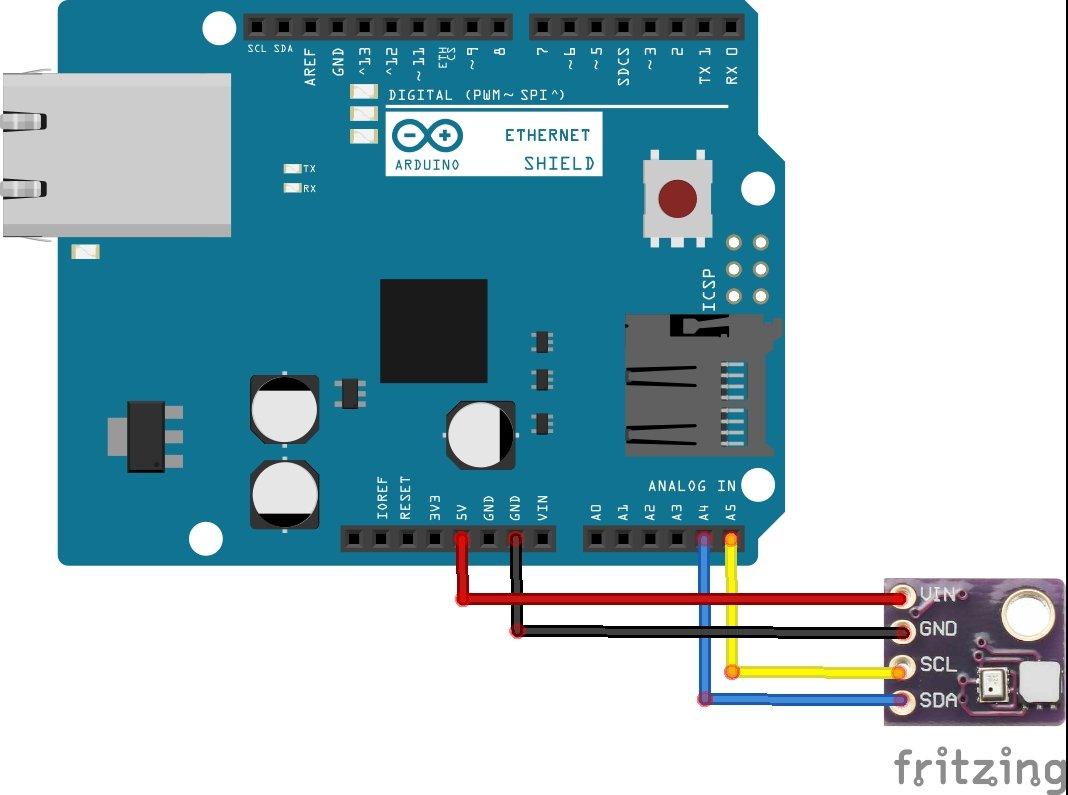
Connect the Ethernet shield and the connect the sensor to the shield connector, like this.

Code
I use a variety of Adafruit libraries, took the default examples and made the following out of them
https://github.com/adafruit/Adafruit_Sensor
https://github.com/adafruit/Adafruit_BMP280_Library
https://github.com/adafruit/Adafruit_Si7021
I got the sea level pressure value from this link
[codesyntax lang=”cpp”]
#define USE_ETHERNET_SHIELD

#include "ThingSpeak.h"
#include <Wire.h>
#include <SPI.h>
#include <Ethernet.h>
#include <Adafruit_Sensor.h>
#include <Adafruit_BMP280.h>
#include "Adafruit_Si7021.h"

byte mac[] = { 0xDE, 0xAD, 0xBE, 0xEF, 0xFE, 0xED};

EthernetClient client;
Adafruit_BMP280 bmp; // I2C
Adafruit_Si7021 sensor = Adafruit_Si7021();

//you will get these from thingspeak
unsigned long myChannelNumber = 629179;
const char * myWriteAPIKey = "VS4RNSQM14XRVNGV";

void setup()
{
  //start the serial
  Serial.begin(9600);
  //network stuff
  Ethernet.begin(mac);
  ThingSpeak.begin(client);
  //start the sensors
  if (!bmp.begin())
  {
  Serial.println("Could not find a valid BMP280 sensor, check wiring!");
  while (1);
  }

  if (!sensor.begin())
  {
  Serial.println("Did not find Si7021 sensor!");
  while (true);
  }
}

void loop()
{
  float bmpPressure = bmp.readPressure();
  float bmpTemperaturee = bmp.readTemperature();
  float bmpAltitude = bmp.readAltitude(1024);
  float siHumidity = sensor.readHumidity();
  float siTemperature = sensor.readTemperature();
  // Write to ThingSpeak. There are up to 8 fields in a channel, allowing you to store up to 8 different
  // pieces of information in a channel.
  ThingSpeak.setField(1, bmpPressure);
  ThingSpeak.setField(2, bmpTemperaturee);
  ThingSpeak.setField(3, bmpAltitude);
  ThingSpeak.setField(4, siHumidity);
  ThingSpeak.setField(5, siTemperature);
  int x = ThingSpeak.writeFields(myChannelNumber, myWriteAPIKey);
  if(x == 200)
  {
    Serial.println("Channel update successful.");
  }
  else
  {
    Serial.println("Problem updating channel. HTTP error code " + String(x));
  }
  delay(20000); // ThingSpeak will only accept updates every 15 seconds.
}
[/codesyntax]
Output
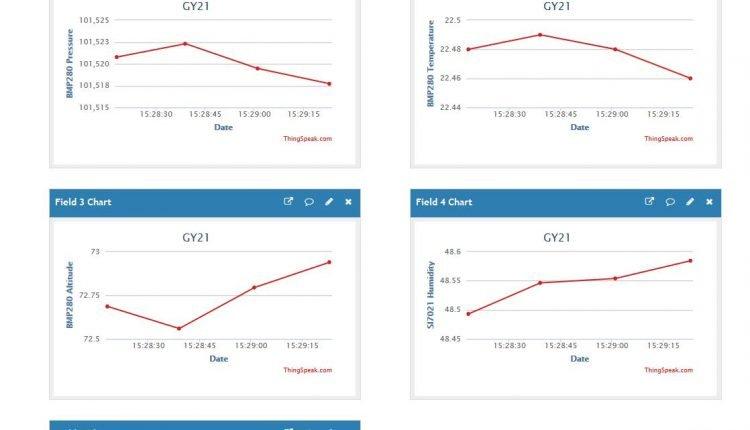
Open your channel and you see data starting to appear – this was my channel data

Links

