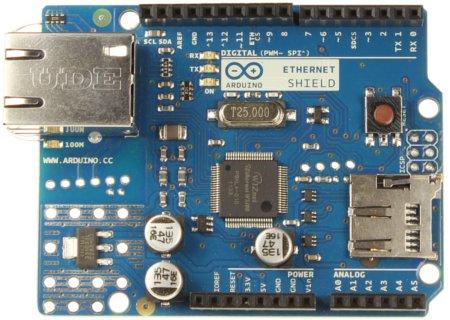
The ethernet shield has an SD card fitted to it, this means that rather than having to write sketches full of html code you can create html files, put them on the sd card file system then serve them via your ARduino sketch. This is what we have here.
I used the SD formatter to setup my SD card, you can get this from – https://www.sdcard.org/downloads/formatter_4/eula_windows/

So for this example you will need an Arduino Uno, an Ethernet Shield and an SD card (I had a spare 2Gb one handy)
Code
First we deal with the web page, this is saved as index.htm and is put onto the root of the SD card. You can use any text editor to create this file and then you have to copy it onto the SD card and then fit the sd card to the Etehrnet shield
[codesyntax lang=”html4strict”]
<!DOCTYPE html>
<html>
    <head>
        <title>Arduino SD Card Web Page</title>
    </head>
    <body>
        <h1>Hello world from the Arduino SD Card!</h1>
        <p>A web page served from the Arduino Ethernet SD card.</p>
    </body>
</html>
[/codesyntax]
Now for the Arduino code
[codesyntax lang=”cpp”]
#include <SPI.h>
#include <Ethernet.h>
#include <SD.h>

// MAC address from Ethernet shield sticker under board
byte mac[] = { 0xDE, 0xAD, 0xBE, 0xEF, 0xFE, 0xED };
IPAddress ip(192, 168, 0, 150); // IP address, may need to change depending on network
EthernetServer server(80);  // create a server at port 80

File webFile;

void setup()
{
    Ethernet.begin(mac, ip);  // initialize Ethernet device
    server.begin();           // start to listen for clients
    Serial.begin(9600);       // for debugging

    // initialize SD card
    Serial.println("Initializing SD card...");
    if (!SD.begin(4))
    {
        Serial.println("ERROR - SD card initialization failed!");
        return;
    }
    Serial.println("SUCCESS - SD card initialized.");
    if (!SD.exists("index.htm"))
    {
        Serial.println("ERROR - Can't find index.htm file!");
        return;  // can't find index file
    }
    Serial.println("SUCCESS - Found index.htm file.");
}

void loop()
{
    EthernetClient client = server.available();  // try to get client

    if (client)
    {
        boolean currentLineIsBlank = true;
        while (client.connected())
        {
            if (client.available())
            {   // client data available to read
                char c = client.read();
                if (c == '\n' && currentLineIsBlank)
                {
                    // send a standard http response header
                    client.println("HTTP/1.1 200 OK");
                    client.println("Content-Type: text/html");
                    client.println("Connection: close");
                    client.println();
                    // send web page
                    webFile = SD.open("index.htm");        // open web page file
                    if (webFile)
                    {
                        while(webFile.available())
                        {
                            client.write(webFile.read()); // send web page to client
                        }
                        webFile.close();
                    }
                    break;
                }
                // every line of text received from the client ends with \r\n
                if (c == '\n')
                {
                    currentLineIsBlank = true;
                }
                else if (c != '\r')
                {
                    // a text character was received from client
                    currentLineIsBlank = false;
                }
            } // end if (client.available())
        } // end while (client.connected())
        delay(1);      // give the web browser time to receive the data
        client.stop(); // close the connection
    } // end if (client)
}
[/codesyntax]
Testing
Upload and open the serial monitor and if all goes well you should see something like the following
Initializing SD card…
SUCCESS – SD card initialized.
SUCCESS – Found index.htm file.
Navigate to the IP address specified in the arduino code
